How to Effectively Replace Damaged WPC Panels in 2026?
Replacing damaged WPC panels in 2026 requires careful planning and execution. WPC, or wood-plastic composite, has gained popularity due to its durability and aesthetic appeal. However, even the best materials can suffer damage. Understanding how to Replace Damaged Wpc Panels effectively is crucial for maintaining your exterior spaces.
A structured approach is essential. Begin by assessing the damage. Identifying the exact problem can prevent complications later. Whether it is discoloration, warping, or cracking, each issue may require different fixing tactics. A professional can provide insights into the best materials and methods for replacement. It's vital to choose the right WPC panels that match the existing design and are compatible with your environment.
Before starting, gather the necessary tools and materials. Ensure that you are prepared for the task ahead. Experience in working with WPC can be beneficial. It's easy to overlook small details, but these can lead to bigger problems. Don't hesitate to consult experts if you are unsure about the process. The goal is to achieve a seamless repair that enhances the overall look of your space. Replacing damaged WPC panels is a challenge, but with dedication, it can be a rewarding project.
Understanding WPC Panels: Composition and Common Damage Types
WPC panels, made from a blend of wood fibers and recycled plastic, offer durability and aesthetic appeal. However, like any material, they can suffer damage. Understanding the common types of damage is crucial for effective replacement.
Common issues include warping, cracking, and fading. Warping often occurs due to moisture exposure. Cracking typically results from temperature fluctuations. Fading happens when panels are exposed to excessive sunlight. Each type of damage requires a tailored approach for repair or replacement. It’s essential to evaluate the extent of damage before proceeding.
When replacing damaged WPC panels, consider matching the color and texture of existing panels. Mismatched materials can disrupt the overall look. Be mindful to check for consistent panel fit. Gaps or irregularities can be frustrating. If you find a panel that is chipped, ensure it’s removed carefully. Replacing them requires patience and attention to detail. In the long run, proper handling prevents further problems.
Evaluating the Extent of Damage: When to Replace vs. Repair
When evaluating WPC panels, consider the extent of damage. Minor scratches or surface-level issues can often be repaired. A recent industry report indicates that 70% of panel damage can be mitigated through proper maintenance techniques. This includes regular cleaning and applying protective coatings. However, deeper structural damage often necessitates replacement.
Check for signs of severe weathering, warping, or significant cracks. These usually indicate that replacement is the best option. In fact, reports show that damaged panels can lead to further deterioration if not addressed. Don't underestimate the impact of moisture exposure. A study found that moisture can compromise the integrity of WPC, resulting in up to a 40% reduction in lifespan for untreated panels.
Tips: Inspect your panels twice a year. Look closely at joints and edges where damage is more likely. If you notice deep cracks, it’s often time to replace. In some cases, mixing old and new panels may not yield the best aesthetic. Always consider uniformity when planning a replacement.
Tools and Materials Needed for Replacing WPC Panels
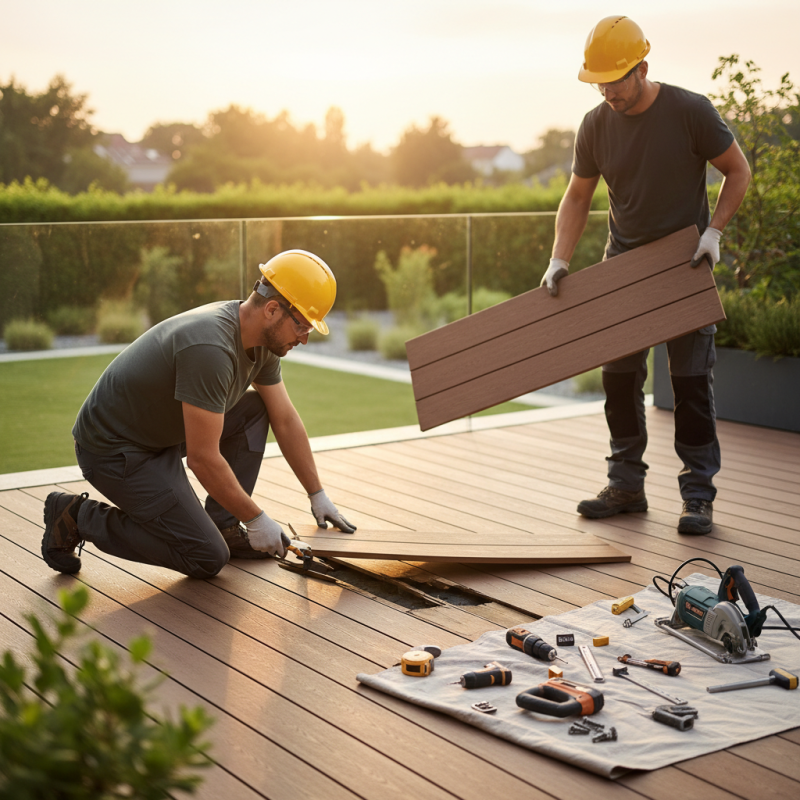
Replacing damaged WPC (Wood Plastic Composite) panels requires specific tools and materials to ensure a successful outcome. Basic tools such as a saw, drill, and screwdriver are essential. Additionally, you will need replacement panels that match the existing ones. Adhesive or screws for securing the panels are critical. Gather safety gear like gloves and goggles to protect yourself during the process.
When starting, ensure you have a clean work area. Measure the damaged panels accurately. Sometimes, minor issues can arise from miscalculations. It's wise to double-check dimensions before cutting. Keep a level handy to ensure everything is aligned properly. This will save time and avoid redo work.
Tips for a smooth replacement process: Always allow new panels to acclimate before installation. Review manufacturer instructions, if available, for specific recommendations. Do not rush through removing old panels; take your time to avoid damage to surrounding areas. Reflect on what caused the damage in the first place. Identifying root issues can help prevent future problems.
Tools and Materials Needed for Replacing WPC Panels in 2026
Step-by-Step Guide to Safely Remove Damaged WPC Panels
Replacing damaged WPC (Wood-Plastic Composite) panels requires careful attention. This step-by-step guide focuses on safely removing those panels. Begin by assessing the damage. Use a moisture meter to check levels. Over 30% moisture can indicate serious issues.
When ready, gather essential tools. You’ll need utility knives, pry bars, and safety gear. Always wear gloves and goggles for protection. Remove any surrounding fixtures that may obstruct the panel. Use a utility knife to cut through the seams, ensuring a clean break. Apply steady pressure with a pry bar to lift the panel. It may require force, especially if the adhesive is strong.
Industry reports indicate that approximately 25% of WPC installations face damage within the first few years. Weather elements and improper maintenance lead to this. Take notes on the removal process. Reflecting on methods used can help improve efficiency. Once the damaged panel is removed, inspect the substructure. Look for mold or structural weaknesses. This careful evaluation is critical for long-lasting installations. Replace with quality panels that meet industry standards.
How to Effectively Replace Damaged WPC Panels in 2026? - Step-by-Step Guide to Safely Remove Damaged WPC Panels
| Step Number | Task Description | Estimated Time (Hours) | Required Tools | Safety Precautions |
| 1 | Assess the damage on the WPC panels | 1 | None | Wear safety goggles |
| 2 | Gather required tools and materials | 0.5 | Screwdriver, pry bar, replacement panels | Ensure work area is clear |
| 3 | Remove damaged panels carefully | 2 | Screwdriver, pry bar | Use gloves to avoid injury |
| 4 | Prepare the surface for new panel installation | 1.5 | Sandpaper, vacuum | Wear a dust mask |
| 5 | Install the new WPC panels | 2 | Screwdriver, drill | Follow manufacturer guidelines |
| 6 | Inspect the installation and clean the area | 0.5 | Broom, trash bags | Ensure no sharp objects remain |
Installing New WPC Panels: Best Practices for Longevity and Durability
Replacing damaged WPC panels can be demanding. However, with the right practices, you can ensure durability and longevity. Proper installation methods play a critical role. Begin by choosing the right tools and materials. Investing in quality supplies pays off over time.
When installing new WPC panels, ensure a stable foundation. Uneven surfaces lead to faster degradation. Aim for a level base, removing debris or old materials thoroughly. This may take extra effort but prevents future problems.
Tip: Regularly check for gaps, as they can allow moisture in. Any irregularity should be fixed promptly. Pay attention to how panels fit together. This detail significantly impacts their lifespan.
Another important factor is weather treatment. Harsh conditions affect WPC panels differently. Consider protective coatings or sealants suited for your environment. Make sure these choices align with your long-term goals. Reflect on your local climate and adjust accordingly for enhanced performance.